February 2003
Tuesday 11th February 2003
For the past week or so, a steady stream of deliveries have been arriving from Norgren, leaving me with most of the pneumatic components I need. Some were still outstanding, but the main items are shown below, together with my latest attempt at a schematic diagram.
|
|
|
|
|
|
|
|

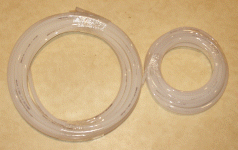
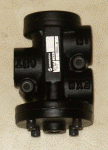
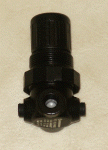

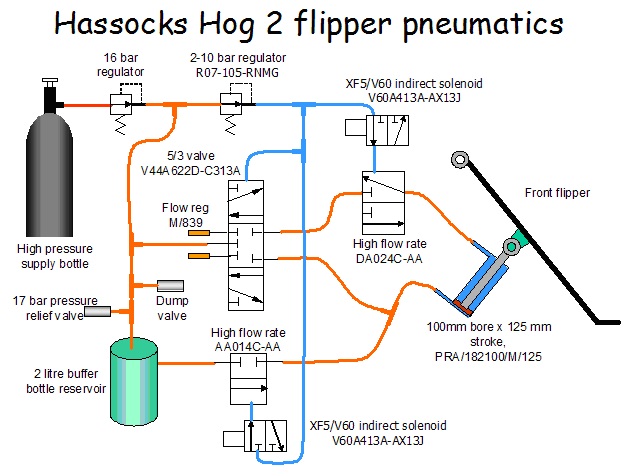
I have to say here and now that I am by no means an expert on pneumatics, so if any of you want to plagiarise my design, you do so entirely at your own risk!
Thursday 13th February 2003
|
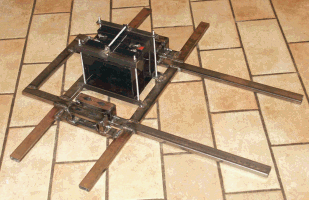
Having an idea of the size of the pneumatic components allowed me to progress with building the chassis, which now has the left and right sides welded together. Here you can see the axles mounted on their supports. |
 |
|
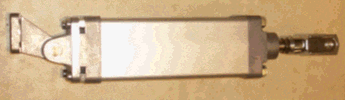
With the axles now in place, I played about with positioning the ram, motors, and batteries. I decided to place the batteries right between the axles for several reasons. Firstly, it would put a lot of weight directly over the wheels thereby increasing grip. It also meant that with the motors positioned at the rear of the chassis and the radio receiver in with the motor controller at the front of the robot, there would be be a lot of lead between the two to screen out motor interference from the receiver. And lastly, the batteries fitted nicely between the shafts with the minimum of wasted space. I had initially wanted to site the ram between the axles, but thought that there was not going to be much room to fit the pipework onto it as well. With the ram positioned just in front of the battery, there was plenty of room on either side where I could fit the high flow rate valve as close as possible to the ram. |
 |
Friday 28th February 2003
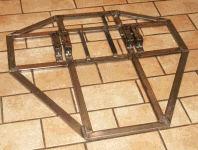
Now that I had decided on the position of the ram being just in front of the batteries, I looked a bit deeper into how I would mount the bottom of the ram onto the chassis. Good as the proper Norgren rear mounting was, it was a bit bigger than I really wanted to use. It was 70mm high, which was 70mm higher than I wanted the ram to be. I had a look about the garage to see if I could find any metal tubing that I could weld to the bottom of the chassis, and use to secure the rear mounting pin through.
I needed a tube with an inside diameter of 20mm, and had almost given up the search when I spotted my old "cheap and nasty" bench drill stand laying in the corner of the garage. I had put it to one side in disgust when it had caused me to almost ruin the motor shafts with it's slack and jittery mounting bracket. What caught my eye now was the vertical pillar. With the aid of my Vernier calipers, I measured the inside of this pillar, and it was a fraction over 20mm, but this was close enough for me. If the metal wasn't going to be much good as a bench drill, then I might as well put it to good use as a rear ram mounting bracket.
With a glint of satisfaction in my eye, I cut a length of the pillar off, and welded it to a mounting bracket that would now secure the bottom of the ram to the chassis. You can just about make out the tube in the left hand photo below, in front of the battery compartment.
I then went on to weld some outside struts to the chassis, which finally fixes the overall dimensions of the Hog.
 |
 |